 |
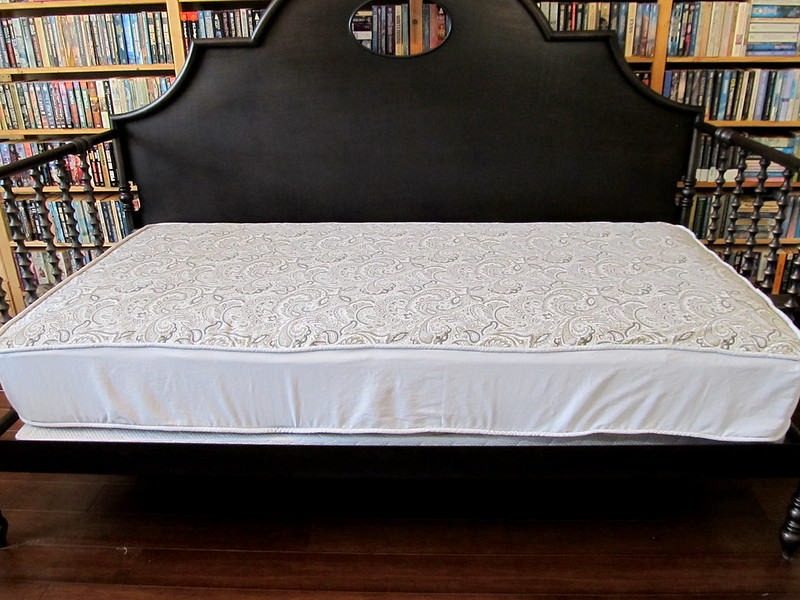
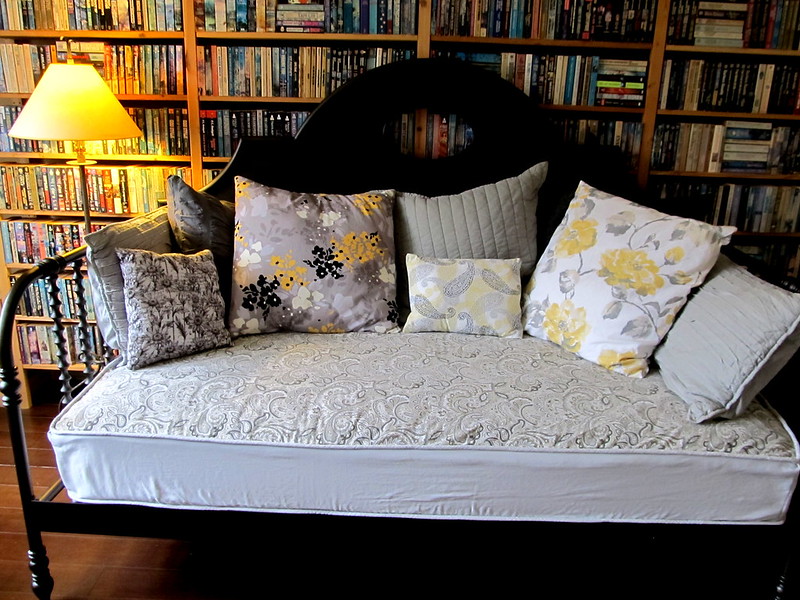
| The finished product. Ignore the fact that I did not pull all the wrinkles tight on the front view- I was tired. There are other finished picture at the end of this semi-tutorial. |
Second, I did indeed throw all the key-words into the title.
Okay, enough counting and onto the business at hand.
You are likely here because like me you discovered that a fitted daybed cover is expensive and available only in limited colors. You may have tried a fitted sheet, or a folded cover, only to discover that it does not stay put and does not maintain the smooth finished look you are going for.
I based the design on a basic box pillow cover. You can find multiple tutorials on-line, in books, and most especially on YouTube. (I repeat, this is a semi-tutorial; a guideline to inspire you.)
I modified the basic box concept to replace the back of the cushion with a flap- adding the benefit of no zipper- and replacing the bottom with three flaps, thus the Easy On, Easy Off of the title.
My upholstered cover is tied on.
Let us start with my terminology:
- Top - the part you sit on.
- Bottom - the part that rests on the box springs or slats.
- Sides - are the short measurement where the arm rests are.
- Front - the long side which faces the world.
- Back - is opposite the front and on most daybeds against the bed frame or wall.
Note, if you have an open or exposed back, this project will need tweaking at a minimum or may simply not work.
Fabric Measurements- your measurements may vary. (My cuts allow for a 1 inch seam allowances.)
- Top: 77 inches long x 41 inches wide
- Sides: 41 inches long x 10 inches wide (my mattress measured 8 inches high)
- Front: 77 inches long x 10 inches wide
- Top piping or cording fabric: 248 inches long x 3 inches wide (I used 12/32 diameter cotton cording)
- Bottom piping or cording fabric: 171 inches long x 3 inches wide
- Two Side bottom flaps: 38 inches long x 8 inches wide each (1 for the right 1 for the left)
- Front bottom flap: 75 inches long x 6 inches wide
- Back top flap: 75 inches long x 4 inches wide (guessing on the width here.)
- Four long ties: 50 inches long x 3 inches wide each
- Four short ties: 10 inches long x 3 inches wide each
- Four tie guides: 3 inches long x 3 inches wide each
Lessons Learned:
For my first attempt I might have been better off using french mattress seams instead of cording or using a smaller cording and buying bias tape. I did not cut my fabric for the cording on a bias.
I cut the sides in three pieces giving me a front corner seam on the left and right. I did this to make the fit more obvious and to better match my ability to fit the finished product to the mattress. The end product would be more professional looking without that additional seam. The alternative would be to make the sides- front, left side, and right side one long piece. In this instance, the measurement would have been 149 inches long x 10 inches wide. Another benefit of side seams is that it allowed me to cut down on the yardage I needed to purchase.
I would have cut the Front Bottom Flap wider- just to give it a tighter fit.
I would have cut the short ties longer for a prettier bow.
The Semi Tutorial or Putting it Together:
If you are making your own piping, make it first. The reason you need different lengths is because the top piping goes around all four sides and the bottom piping only goes around three sides, i.e. front as well as the left and right sides. My fabric cut for the piping reflects those measurements plus an additional 6 inches. (I would rather trim than not have enough; you may be a better seamstress and prefer no waste.)
Next, create the sides of the cover by sewing the left side to the front on the sides measuring 10 inches and the other edge of the front to the right side. This will create one long piece to cover the three sides (height) of the mattress, or a 149 inch length by 10 inch wide. Set this piece aside for a moment.
Sew the piping to the top around all four sides. If you are an experienced seamstress you may, in one fell swoop, sew the piping to the top and sides at the same time. I am not an experienced seamstress so I found sewing the piping only to the top a necessary step before sewing on the sides. It also gave me an early opportunity to make sure my fit was right. I used a zipper foot but for this large a project if you are using smaller cording a cording foot might be a worthwhile purchase. Also, if you use a smaller cording it might be beneficial to actually buy washable bias tape.
As stated above, this is an early opportunity to check the fit. Place the top on the mattress and check the fit of the pipped top. At this point I also pinned the left side, front, and right side to the top to check that fit as well. This is the time to make adjustments.
Now the engineering begins.
Sew that long piece you just set aside, that is the left side, front, and right side to the top piece on the other side of the cording. This is just like every box pillow cover tutorial to this point.
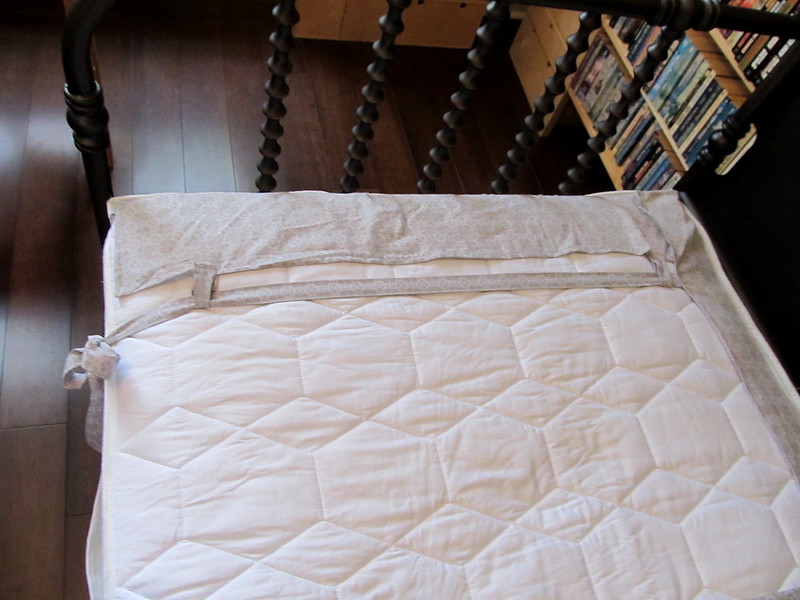
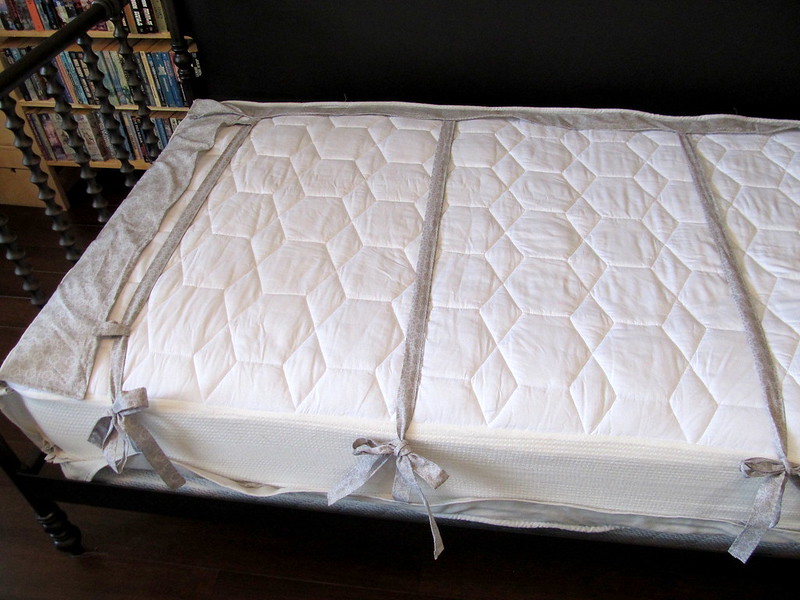
Below is a picture of the back of the daybed cover so you will understand my directions. I took the pictures with the mattress upside down so that all the engineered parts would be easily visible. Flip the picture in your minds-eye. (I did say semi tutorial.) That floppy part at the bottom of the picture, I called the back top flap above. Let me explain that name, when properly placed it is a flap sewn only to the top on the back of the day bed cover which is then tucked between the mattress and the daybed.
 |
| Back top flap- yes, it is upside down and backwards! It was the best way to take a picture. |
Pause before continuing on to the fourth side with what I have named the back top flap. This is the flap that attaches to the top of the cover and will be sandwiched between the mattress and the daybed. Sew a small hem the length of the back top flap and along the two short sides, this will create a finished back. Now, attach the non-hemmed long side to the top of the cover. You do not want to sew the back top flap to the side pieces just to the top piece on the other side of the cording. This piece provides an anchor for the ties. This will give you a nicely finished top and, as advertised, make the cover easy on, easy off. Bonus, it will also give you a pretty back- an easy tweak would be to make it a bit longer thus covering more of the mattress.
At this point you have the top completed and the sides sewn on. Most of the work is done!
More engineering pictures ahead.
This is a picture of the completed bottom of the mattress:
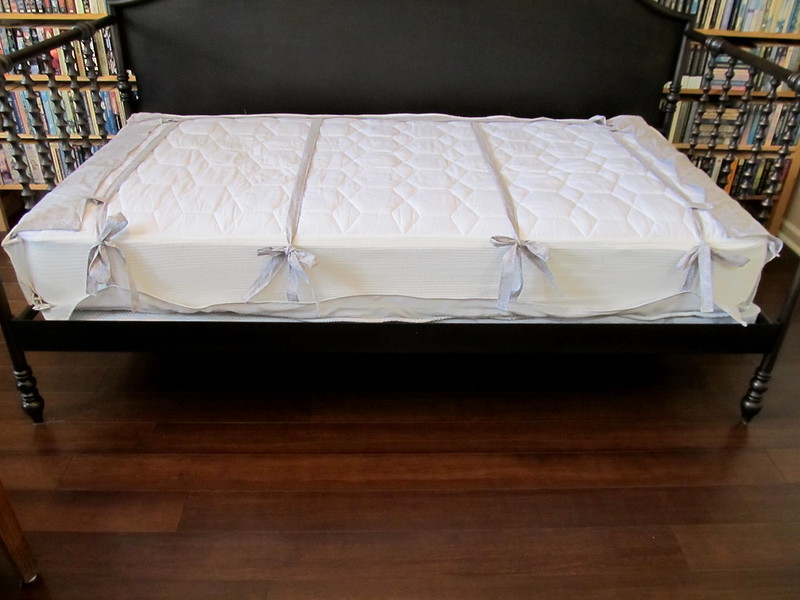 |
| Completed bottom of the mattress |
At the top of the picture below is a close up of the side bottom side flap and the tie guides:
 |
| Side bottom flap at the top of the picture with the front bottom flap to the right on the picture. |
 |
| At the 12:00 O'clock position is the front bottom flap. The 6:00
O'clock position is the back top flap. The 9:00 O'clock position is the
side bottom flap. Note also the tie guides attached to the side bottom flap. |
The purpose of the bottom flaps is two fold
(1) to tuck under the mattress just as you would tuck in a sheet and
(2) to provide a place to anchor the ties. Both the tuck and the ties are what makes this cover stay on tight.
Picking up where we left off...
Now, sew the piping, or cording, to the bottom of the three sides, left, front, and right.
Take the monster you have created and fit it to the mattress. Is it a good fit? Make adjustments if it is not. (I won't admit to how many times I ripped out seams up to this point.)
Lesson learned here- I used upholstery linen and it frayed quite badly. If you use a similar fabric you might want to hem or finish all the edges.
After you have tweaked the fit, you attach the three remaining flaps to the bottom of the sides.
Sew a small hem around three sides of both side bottom flaps so you will have finished edges. (Yes that was a very convoluted sentence.) These are the flaps which will go under the mattress on left and right sides.
Using your scraps, make the four tie guides; these are like belt loops on pants. These can be any width, I made mine three inches wide and three inches long and that worked out well. When folded and seamed they were about 1.5 inches wide.
Attach tie guides to the hemmed side of the two side bottom flaps. I used two per flap and positioned one near the front of the mattress and one near the back. You may attach as many as you would like. These tie guides essential to keeping the upholstered cover tight.
Now, sew the unfinished sides of the side bottom flaps to the corded sides. Think of these flaps as a partial bottom to the box pillow cover I keep referencing.
That leaves one last flap. This is what I have called the front bottom flap. This is the flap that will tuck under the front of the mattress and tie to the back of the mattress.
Hem three sides of the front bottom flap, one long side and two short sides. Then attach the unfinished long side to the piped edge of the front. Note- do not sew the short edges to the side bottom flaps. This should be attached only to the front.
You should now have the left side, front, and right side sewn to the top; piping sewn to the bottom edges of the left side, front, and right sides, and the bottom flaps sewn to the left side, front, and right side.
Take a deep breath, almost there. Now create the ties. You are going to make a total of eight ties. Make four long ties, 50 inches long by three inches wide, which will attach to the front bottom flap. and four short ties measuring 10 inches long by 3 inches wide. Being the inexperienced seamstress I am, I thought I would just sew the wrong sides together and then pull them through and press. Wrong! Too much bulk or an impatient maker. I made use of my hot iron and pressed in a small hem on each long side and then top sewed the long seam on every tie. Then tuck in the ends and finish the ties with a hem.
I measured at this point to determine where to sew on the ties. Since the finished side bottom flaps are approximately six inches wide I measured in six inches from each side on the front bottom flap and attached a long tie at that point. If you made your bottom flap wider, as I will do if I make another cover, use that as a measurement. Then I measured the distance left between the two ties and decided the middle ties would be best placed closer to the middle than to the edges to assure a cover which will stay in place... I ended up with the ties placed 25 inches from the edges. Whatever measurements you come up with, make sure you write them down because you are going to need to use those same measurements to attach the short ties to the back top flap. (Oh my all these flap names are making my head spin.)
Now sew the four long ties to the hemmed side of the front bottom flap and then the four short ties to the hemmed side of the back top flap.
You are done sewing. Now to fit it to your daybed.
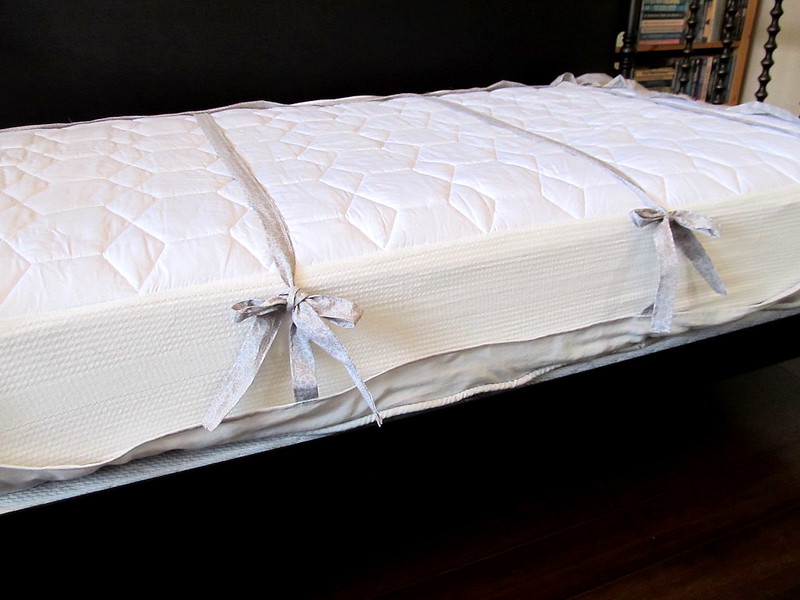
I found it easiest to lay the cover on top of the mattress leaving the flaps loose and untucked. Facing the front of the bed, run the long ties through the tie guides on the sides and then flip and tuck the side flaps under the mattress leaving the long ties hanging out the back. The tricky part is pushing those long ties in the center to the back. It really is just like tucking in the sheets except you need to hold the long tie in your fist and push as far as you can before letting go. Pull the daybed away from the wall (or the mattress away from the daybed) and reach under the mattress and tug those center long ties all the way to the back so they hang loose. Now, tie a pretty bow with the long and short ties and push the bed back into place.
Done, done, done.
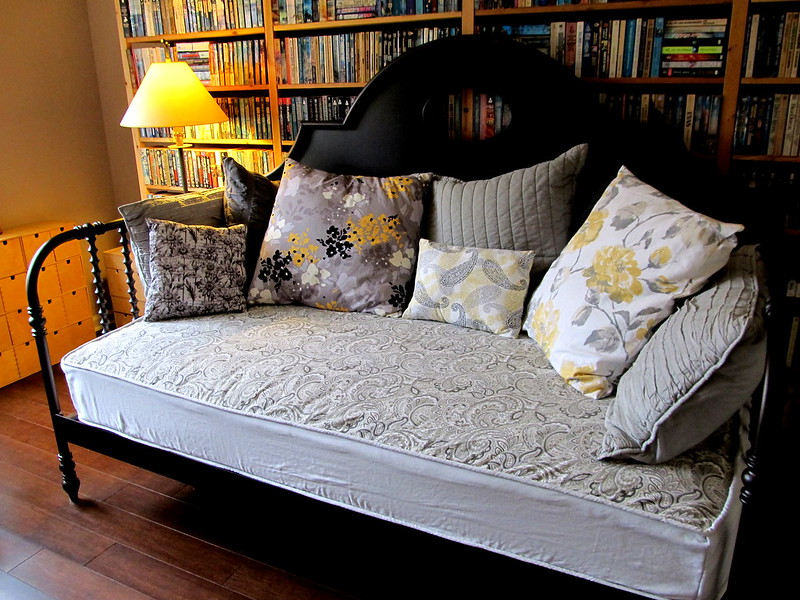
I have been living with this cover for about half a year and it has stayed put and looks fabulous, even if I do say so myself.
 | |
| Done and decorated and still a bit wrinkled, but I am blaming it on the linen this time. |
 |
| From the top |
 |
| From the right side |